Cooking ham comes down to one essential rule: 15 to 20 minutes per pound at 325°F, and you’ll want your meat thermometer to hit 140°F for pre-cooked hams or 160°F for raw ones. Get this wrong and you’re either serving undercooked meat (a genuine health hazard) or a dried-out disappointment that no amount of glaze can save. The good news? Ham is more forgiving than you might think, especially if you’re starting with quality meat from Toronto organic stores where the farmers actually know what their pigs ate.
Most hams you’ll find at the grocery store are already cooked, which means your job is simply to heat them through and get that outer layer caramelized and delicious. But there’s a world of difference between a spiral-cut honey ham and a whole bone-in beauty, and the timing shifts accordingly. The real trick isn’t just watching the clock. It’s understanding what type of ham you’re working with, how to properly thaw it (plan 4 to 6 hours per pound in the fridge), and why letting it sit at room temperature for about 30 minutes before cooking makes such a difference in even heating.
Whether you’re prepping for Easter dinner or a holiday feast, nailing your ham timing means everything else on the table stays on schedule too.
What You’ll Need Before You Start
Getting your ham right starts long before it hits the oven. You don’t need a chef’s arsenal, but having the right tools makes the difference between guesswork and guaranteed success. Here’s what belongs on your counter before you unwrap that beautiful organic ham.
- Meat thermometer (instant-read digital preferred), the only reliable way to know when your ham is safely done without cutting into it
- Roasting pan with rack, keeps ham elevated so heat circulates evenly and the bottom doesn’t steam in its own juices
- Aluminum foil, shields the surface from drying out during the long cook while letting the inside heat through
- Basting brush, helps you apply glaze evenly and build those gorgeous caramelized layers
- Heavy-duty oven mitts, you’ll be maneuvering a hot, heavy roasting pan multiple times
- Sharp carving knife, makes clean slices once your perfectly cooked ham has rested
If you’re glazing your ham (and honestly, why wouldn’t you?), gather brown sugar, maple syrup, mustard, or whatever suits your taste. The glaze goes on during the last 30-45 minutes of cooking, so you’ve got time to mix it while the ham does its thing.
For Toronto folks sourcing quality organic ham, check out The Healthy Butcher on Queen West or Cumbraes in the Distillery District. Both carry ethically raised, nitrate-free options perfect for holiday tables. St. Lawrence Market’s vendors also stock excellent local hams, especially during Easter and Christmas season. Farmers’ markets like Evergreen Brick Works often feature smaller producers with gorgeous pasture-raised options.
One tool you absolutely cannot skip is that meat thermometer. Eyeballing it or relying on cooking time alone leaves too much room for error. You’re aiming for 140°F for pre-cooked ham or 160°F for raw, and the only way to nail that is measuring it directly.
Know Your Ham: Pre-Cooked vs. Raw Makes All the Difference
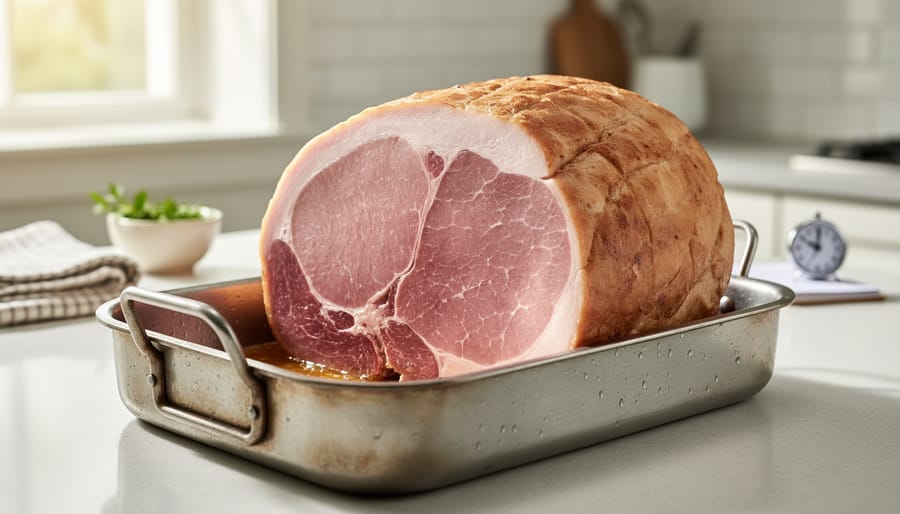
The label on your ham tells you everything you need to know about cooking time, but only if you know what to look for. Pre-cooked (or cured) hams are already safe to eat straight from the package. You’re just reheating them to 140°F, which takes that gentle 15-20 minutes per pound at 325°F. Raw or fresh hams, on the other hand, must reach 160°F to be safe, and they’ll need longer in the oven since you’re cooking them from scratch, not just warming them through.
Most hams you’ll find at Toronto butchers and farmers’ markets are pre-cooked, whether they’re conventional spiral-cuts or organic beauties from local producers. The organic and artisanal options tend to be wet-cured or dry-cured, giving them deeper flavor and often a firmer texture than mass-market hams. If you’re shopping at St. Lawrence Market or a specialty organic shop, ask the butcher directly. They’ll tell you whether you’re reheating or cooking from raw, and they can often recommend timing adjustments for their specific cure methods. Fresh hams are rarer but worth the extra effort if you want complete control over seasoning and smoke.
Before the Oven: Thawing and Prep Steps
Thawing Your Ham Safely
The safest way to thaw your frozen ham is in the refrigerator, hands down. Plan on roughly 4-6 hours per pound, which means a 10-pound ham needs about two full days in the fridge before you can cook it. Yes, that’s a long wait, but it keeps your ham in the food safety zone the entire time and prevents bacteria from throwing an unwanted party on your holiday centerpiece.
Never thaw ham on the kitchen counter, no matter how rushed you are. Room temperature creates the perfect breeding ground for harmful bacteria, and even a few hours can turn your beautiful organic ham into a health risk. Toronto Public Health emphasizes keeping perishable foods out of the “danger zone” (4°C to 60°C), and counter-thawing violates that rule completely.
Here’s how to plan your timeline: if you’re cooking ham on Sunday, move it from freezer to fridge by Thursday evening for a typical 8-10 pound ham. Keep it in its original packaging, set it on a rimmed tray or plate to catch any drips, and place it on a lower shelf so it doesn’t contaminate other foods. This is the same careful timing approach you’d use for turkey cooking time calculations during the holidays.
If you’re buying from a local Toronto butcher or farmers’ market, ask whether the ham was previously frozen. Many artisanal producers sell fresh, never-frozen options that skip this step entirely and head straight to the next stage of prep. Either way, slow refrigerator thawing protects both quality and safety, giving you the juicy results your holiday table deserves.
Bringing Ham to Room Temperature
Pulling your ham straight from the fridge and tossing it into the oven might seem like a time-saver, but it’s actually setting yourself up for uneven cooking and dry, disappointing results. The cold center takes forever to warm up while the outer layers keep heating, which means you’ll either undercook the middle or overcook the edges trying to get everything to temperature.
Let your ham sit out at room temperature for about 30 minutes before it goes in the oven. This simple step takes the chill off and gives you a head start on even heating throughout. When the ham starts closer to room temp, the oven doesn’t have to work as hard to bring the center up to that safe 140°F (for pre-cooked) or 160°F (for raw). You’ll actually shorten your total cooking time and end up with meat that’s uniformly heated and tender, not dry around the edges with a cool spot in the middle.
On busy holiday mornings when you’re juggling side dishes and trying to time everything perfectly, this 30-minute window is your friend. Pull the ham from the fridge while you’re preheating the oven and prepping your glaze or getting other dishes started. Just don’t push it past an hour at room temperature, food safety matters, especially with a houseful of guests counting on you. Set a timer if things are hectic, pat the ham dry if any moisture has collected on the surface, and you’re ready to roast.
Step-by-Step: How to Cook Your Ham Perfectly
Calculating Your Exact Cooking Time
Start with your ham’s weight and apply the 15-20 minutes per pound formula to find your baseline. An 8-pound ham needs 120-160 minutes (that’s 2 to 2.5 hours), while a 12-pounder requires 180-240 minutes (3 to 4 hours). This range isn’t vague guesswork, it accounts for real variables that shift your timeline.
Bone-in hams need the full 20 minutes per pound because bone slows heat transfer to the center. Boneless versions cook faster, closer to 15 minutes per pound, since there’s no obstruction. Spiral-cut hams, with all those pre-sliced edges, also heat through quicker than whole hams with intact surfaces. If you’re working with a spiral-cut bone-in ham, aim for the middle of the range.
Your oven’s actual temperature matters more than you’d think. Most home ovens run 10-25 degrees off their dial setting. If yours runs cool, add 15-20 minutes to your total time. If it runs hot, check your ham 20 minutes early to avoid overcooking. An oven thermometer costs a few dollars and eliminates this guesswork, much like following a precise roast by weight approach for other holiday proteins.
Write your calculated time on a sticky note and set a timer for 30 minutes before that mark. That’s when you’ll start checking the internal temperature. This buffer keeps you from walking into a dried-out disaster. For more timing strategies across different meats, check this oven roasting guide that covers the same principles.
The Low-and-Slow Secret for Juicy Results
Here’s the thing about ham: it’s already cured and packed with flavour, so your job isn’t to cook it, it’s to heat it gently without turning it into sawdust. That’s where the low-and-slow approach shines.
Set your oven to 325°F (or even drop it to 300°F if you’ve got time). This gentle heat lets the ham warm through evenly without forcing out all its natural moisture and fat. Crank the temperature higher, and you’ll squeeze the juices right out, leaving you with that dry, chalky texture nobody wants on their holiday plate.
To keep things moist throughout, add a shallow layer of water or apple juice to your roasting pan, about half an inch. Cover the ham loosely with foil for most of the cooking time, trapping steam around the meat. Baste every 30-40 minutes with pan drippings or your glaze (if you’re using one). This creates a protective coating that locks in moisture while adding flavour.
Remove the foil for the final 20-30 minutes to let the surface caramelize beautifully. The result? Ham that’s tender, juicy, and worth the wait, exactly what your holiday table deserves.
Checking Doneness the Right Way
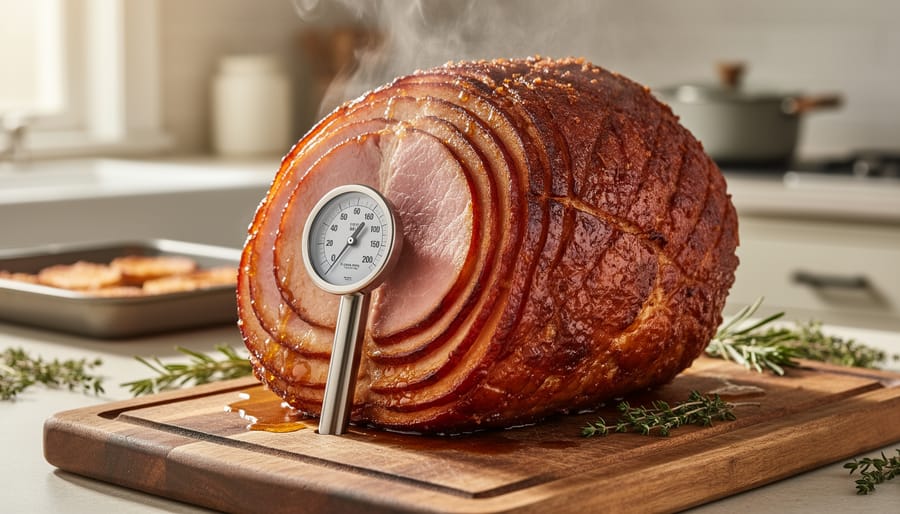
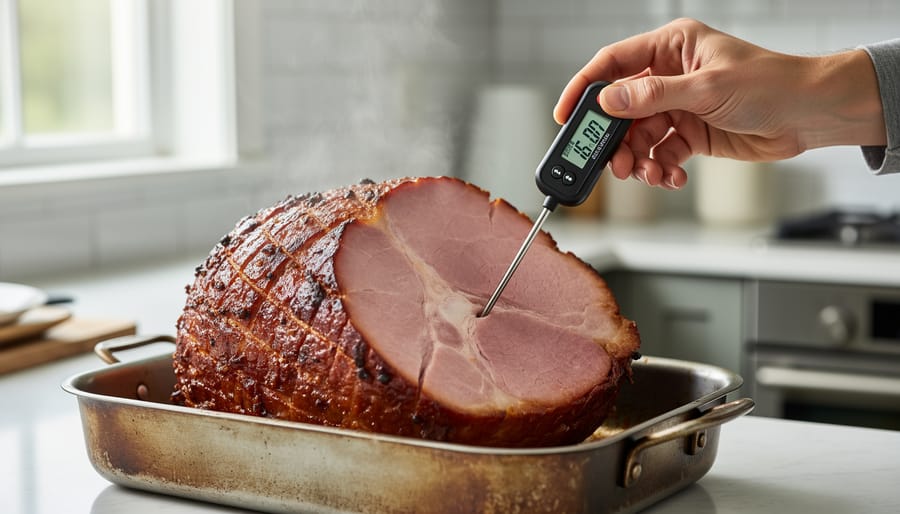
Slide your thermometer into the thickest part of the ham, aiming for the center of the muscle. If you’re working with a bone-in ham, make sure the probe doesn’t touch the bone, metal conducts heat faster than meat, so you’ll get a falsely high reading and risk pulling your ham too early. For spiral-cut hams, insert the thermometer horizontally between the slices to reach the deepest part without creating gaps.
Watch for 140°F if your ham is pre-cooked (check the label, most grocery store hams fall into this category), or 160°F for a raw, fresh ham. When the numbers climb into range, take readings from two or three different spots to confirm even heating. Digital instant-read thermometers give the fastest, most reliable results.
If your ham hasn’t hit target temperature when your timer goes off, tent it with foil to prevent the surface from drying and give it another 15-20 minutes. Check again, then repeat as needed. Don’t rush it, underdone ham is a genuine food safety concern, especially with raw varieties. Once you’ve confirmed the right temp throughout, pull the pan and let the magic happen during the resting phase.
Safety First: What to Watch For
Cooking ham safely means hitting the right internal temperature and keeping everything clean along the way. Pre-cooked or cured hams must reach 140°F, while raw or fresh hams need 160°F to eliminate harmful bacteria. Use a clean meat thermometer and avoid letting the probe touch bone, which can give you a false reading that leaves the meat undercooked in the center.
Cross-contamination is a real risk when handling raw ham. Wash your hands, cutting boards, and any utensils that touch raw meat before they come into contact with other foods. Organic and uncured hams don’t contain the nitrates found in conventional cured products, so they can spoil faster and require extra attention. Check for off smells, slimy texture, or gray discoloration before cooking, and trust your nose if something seems wrong.
Once your ham is cooked and served, get leftovers keep 3 to 4 days in the fridge when stored in airtight containers. Label them with the date so you know when to toss them. If your ham has been sitting out on the buffet table through a long holiday meal and you’ve lost track of time, play it safe and discard any portion that’s been unrefrigerated for over two hours. Toronto’s food safety standards are strict for good reason, and organic ham deserves the same careful handling as any protein to keep your family healthy and your holiday meal memorable for all the right reasons.
How to Tell Your Ham Is Done (and What Comes Next)
Your ham is ready when the thermometer reads 140°F for pre-cooked or 160°F for raw in the thickest part of the meat, away from the bone. Check multiple spots to be sure. You’ll also notice the juices running clear when you pierce the meat, and if you’re working with a bone-in ham, the meat should be pulling away from the bone slightly. These visual cues confirm what the thermometer tells you.
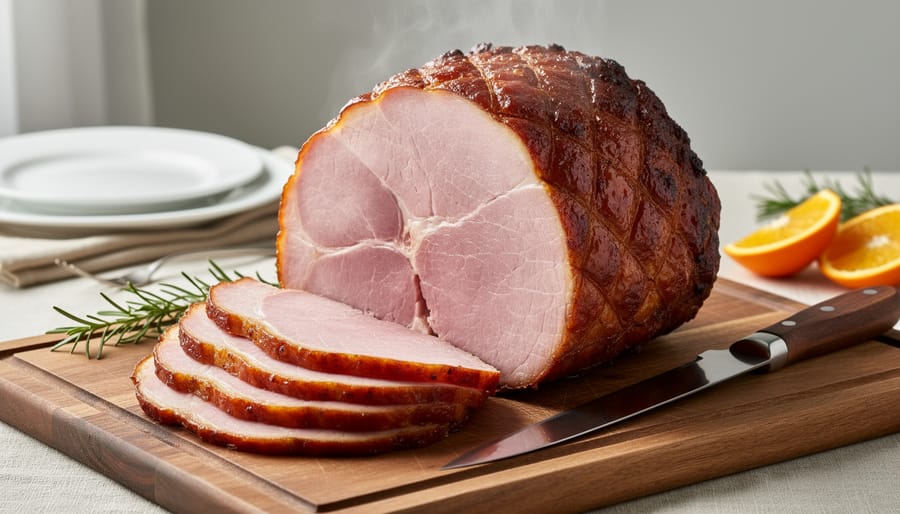
Once your ham hits temp, resist the urge to carve immediately. Transfer it to a cutting board and tent loosely with foil for 10-15 minutes. This resting period lets the juices redistribute throughout the meat instead of flooding out onto the board the second you slice. Think of it like the cooking ratio tips that make grains fluffy rather than mushy, patience pays off with better texture.
When you’re ready to carve, start by removing any skin or excess fat. For a bone-in ham, cut perpendicular to the bone in thin, even slices. Boneless hams are simpler: just slice across the grain at your preferred thickness. Arrange slices on a warm platter, slightly overlapping, with the best-looking pieces on top. Any glaze left in the pan makes a gorgeous drizzle over the finished slices.
Carving at the table looks impressive, but doing it in the kitchen gives you control and lets you plate beautifully for your guests.
Common Ham Timing Questions Answered
Do I need to cover ham with foil the whole time?
Not the whole time, cover loosely for the first hour or two to retain moisture, then uncover for the final 30-45 minutes (especially if glazing) to let the surface caramelize and develop that gorgeous golden finish.
Can I cook ham at a higher temperature to save time?
Technically yes, but don’t, cranking the heat to 400°F will dry out your ham and give you that chalky, disappointing texture we’re trying to avoid. Stick with gentle 325°F heat for juicy results, even if it means starting earlier.
What if my ham is frozen solid and I forgot to thaw it?
You’ll need to add roughly 50% more cooking time and monitor the internal temperature closely, a frozen 8-pound ham might take 3-4 hours instead of the usual 2-2.5. Plan on 4-6 hours per pound for fridge thawing next time to avoid this stress.
How do I reheat leftover ham without drying it out?
Slice what you need, place it in a covered dish with a splash of water or broth, and warm at 275°F for about 10 minutes per pound until heated through. The moisture and gentle heat keep it from turning into shoe leather.
Does organic ham cook differently than conventional?
The timing stays the same, 15-20 minutes per pound at 325°F, but organic and nitrate-free hams sometimes have a slightly different texture and may require closer attention to avoid overcooking since they lack some of the preservatives that help conventional hams retain moisture.
A couple of Toronto readers have also asked about storing leftovers from those generous organic hams you’ll find at St. Lawrence Market. Once your ham’s carved and cooled, refrigerate it within two hours, wrapped tightly. It’ll keep for three to four days, giving you plenty of time for sandwiches, scrambles, and soup before quality starts to decline.
You’ve got this. Armed with the 15-20 minutes per pound guideline and a trusty meat thermometer, you’re ready to deliver a ham that’s perfectly heated through, wonderfully juicy, and safe to serve. No more guessing, no more dry disappointments. Just follow the temperatures, respect the timing, and let your ham rest before carving.
Toronto’s food scene makes it easy to go the extra mile. Swing by St. Lawrence Market, visit your neighbourhood butcher, or check out weekend farmers’ markets for organic, locally-sourced hams that deserve this kind of care. Supporting local producers means fresher product, traceable quality, and often a better story to share around the table. When you combine good ingredients with solid technique, you create something worth gathering around.
Cooking ham shouldn’t feel stressful. It’s one of those rewarding kitchen projects where patience and simple attention to detail pay off in smiles and second helpings. Whether it’s Easter, a holiday feast, or just Sunday dinner, nailing the timing transforms your meal from adequate to memorable. Get your hands on a great ham, set that oven to 325°F, and trust the process. Your family and friends will taste the difference.